Painting kitchen cabinets isn’t as simple as grabbing paint off the shelf. Cabinet surfaces accumulate invisible contamination, requiring degreasing to promote good adhesion.
Physical sanding creates the mechanical bond paint needs to grip existing finishes. Start with coarse 120-grit sandpaper, then smooth with finer grit, always sanding with the grain. Contact Modesto Cabinet Painters for more details.
Sanding
Sanding is one of the most critical steps for preparing wood surfaces for painting and staining. It requires patience, careful attention and an understanding of how the abrasive materials work to smooth and refine surface appearance. There are several different sanding options available, depending on the type of material and the desired quality of finish, as well as working environment and safety concerns. The team at Red Label Abrasives compares wet and dry sanding methods to help you choose the right approach based on your project requirements.
It is important to note that the quality of your paint job will be directly related to how well you sand your surface. A good sanding will remove loose debris, blemishes and imperfections, giving you a clean and smooth surface to work with. In some cases, you may need to sand the surface twice in order to achieve the desired results.
In woodworking, sanding is done with a variety of tools ranging from simple manual blocks and sponges to electric sanders designed to speed up the process and reduce physical effort. Choosing the right sandpaper is also critical, with lower numbers indicating coarser abrasives that remove material quickly and higher grits referring to finer abrasive grains for smoother finishes. It’s also important to remember that woods come in all sorts of densities and some sand more easily than others.
Other methods of surface prep include pressure cleaning, which uses a high-pressure spray to remove loose debris and contaminants from the substrate, and flame blasting, which involves holding a gas flame over the surface, effectively removing rust and other unwanted residue. Whatever method is chosen, it’s important to follow the guidelines set out by independent industry oversight agencies. These standards help standardize the results and provide a template to meet specific job specifications.
Cleaning
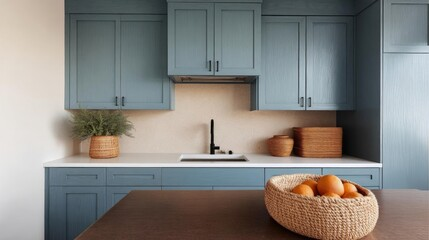
Cabinets are frequently-used, high-visibility surfaces that require a durable finish. It is easy for amateur painters to cut corners that can shorten the lifespan of a paint job, but skilled cabinet painters understand how important it is to thoroughly degrease surfaces and apply multiple coats of high-quality cabinet paint to ensure durability and longevity.
The process of refinishing kitchen cabinets involves careful and efficient removal of doors and drawers, labeling for return, degreasing, sanding, applying a bonding primer, and painting using fine finish spray techniques. This creates a smooth factory-like surface that is durable and ready for new hardware or a updated backsplash.
Experienced cabinet painters will use high-quality acrylic or polyurethane blends that are specifically designed for the surface to be painted. These are more durable than vinyl latex wall paints and can withstand the unique conditions of a kitchen without peeling or bubbling. A wide range of colors are available, from soft pastels to bold statement hues. Customizations like glazing or antiquing are also offered to give your cabinetry a truly unique look and feel.
Primer
If the surface you are painting is porous or has a dark color it will need to be primed before repainting. A primer seals the surface and helps the paint to be absorbed evenly. An unprimed surface will absorb the paint in blotchy areas, which makes for an uneven finish. The use of a primer reduces the amount of paint needed to cover the surface and allows it to be repainted in a shorter amount of time.
Some types of primer can be tinted to help them match the color of a particular type of finishing paint. This is especially helpful if the primer is being used on a large area of the wall or on a darker surface where the color needs to be evened out. A primer can also be used to hide cracks or pin holes in the surface.
Before applying a primer, the surface should be sanded down to make sure it is smooth and ready for painting. You should also make sure to protect any areas that you do not want to be painted with painter’s tape. After the surface is sanded and cleaned it is important to allow the primer to dry completely according to its label instructions. This can take up to a couple hours, depending on the temperature and humidity of the environment.
When using a latex primer, it may take up to an hour for the surface to be dry to the touch. After this time it is ready to be painted. When using a oil-based primer it may take up to two hours for the surface to be dry. Once the primer is dry it is important to allow the topcoat of paint to cure completely. This can be done in a few different ways, depending on the type of paint and the surface.
The most common type of primer is a white latex based primer, although there are many other colors available as well. A painter should always use a high-quality brand of primer to ensure the best results. The amount of coats required for a surface to be ready to paint will vary, but usually one coat is sufficient when painting a wall in good condition that is not being made a drastic change in color or a glossy finish.
Paint
When it comes to cabinet painting, the quality of the finish is what sets apart a professional from an amateur. Professionals follow a meticulous process that includes carefully removing and labeling hardware, degreasing surfaces, sanding, and applying multiple coats of specialized paint designed to hold up to kitchen wear and tear. Budget shortcuts may save money upfront, but often result in visible brushstrokes and an uneven texture that requires expensive repair or repainting down the road.
Unlike walls or ceilings, cabinets are frequently handled and exposed to grease, oils, and moisture. These conditions can compromise a finish before it’s even fully dry, resulting in flaws like peeling and bubbling. Professionals use a wide range of specialized products that are specifically designed for high-traffic cabinetry, including water-based acrylic polyurethanes. This ensures a durable, eye-catching finish that stands up to daily use. House painters, on the other hand, typically rely on latex wall paint that cannot stand up to the unique requirements of cabinetry.
Before the final color can be applied, a ground is usually applied to create an underlying tone that enhances the effectiveness of the top coat. This step is a key differentiator between cabinet painters and house painters. A ground is a dark tone that helps conceal imperfections, such as surface scratches or dings, and provides an even canvas for the application of full color.
Once the ground is dry, the surface can be ready for paint, which is usually applied with a sprayer. The number of coats used will depend on the desired outcome, with more coats providing a deeper, richer appearance. Finally, the finish can be cured for up to a month to allow for proper drying and hardening.
While there is no shortage of companies that claim to offer cabinet painting services, finding an experienced and knowledgeable professional who truly understands the process can be challenging. By taking the time to find a reliable company with an established track record, homeowners can enjoy a beautiful new look that will last for years to come. Achieving this goal requires a thorough understanding of the entire process, from sanding to preparing surfaces to preventing dust and debris buildup during the job.