Water Damage Remediation Guide

Water Damage Remediation Salt Lake City

Water Damage Remediation Salt Lake City is a complex process with multiple steps. It involves removing damaged building materials, drying and dehumidifying affected areas, cleaning and sanitizing surfaces, and repairing structural damage.

It begins with a thorough assessment of the situation. Professionals evaluate the source and extent of the damage, including hidden moisture in attics and crawl spaces.

Preparation

Water damage is more than a nuisance, it can also cause structural damage and serious health risks. It is important to take immediate action and contact a qualified water damage restoration company to minimize the impact on your property and prevent long-term problems such as mold, bacteria, and pests.

Before starting the remediation process, it is necessary to identify and locate the source of the problem. Once the source is identified, the professionals will start by assessing the extent of the damage and determining which materials can be salvaged. The next step is to dry the affected area. This is done by circulating warm air and regulating humidity with dehumidifiers to ensure all moisture has been eliminated. This process can take days and is crucial to preventing further damages and structural failures.

The next step in the water damage repair process is to remove any contaminated materials and belongings that cannot be dried. This includes drywall that has been compromised by water damage, as well as carpeting and other flooring that can no longer be saved. If you have experienced extensive flooding, it may be necessary to remove all impacted material and perform a flood cut in order to prevent further damage to your home’s structure.

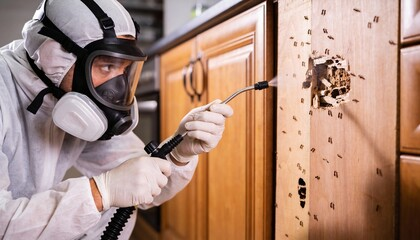
Building materials that are contaminated by gray or black water will also need to be removed and safely discarded. These materials may contain dangerous levels of sewage, harmful chemicals, and bacteria that are hazardous to human exposure. This is because contaminated water often comes from places like broken dishwashers, washing machines, or overflowing toilets. It can also come from flooded sewer systems or river or ocean water flooding, which require more rigorous sanitization.

Inspection

The initial inspection is a crucial step for any water damage remediation job. Before moving in with air movers and extractors, it’s important to get a clear picture of what has been affected, how bad the damage is, and where the water came from. This will allow restoration technicians to create a smart mitigation plan and limit potential losses.

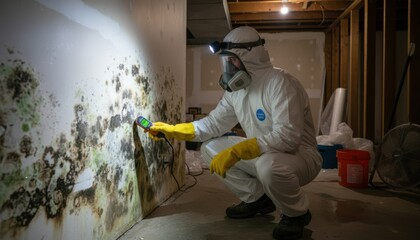
When a home or business experiences water damage, it can lead to the loss of personal belongings, structural damage to a property’s foundation, and health risks from mold and bacteria. That’s why it’s essential to take quick action if you notice signs of water damage, such as yellowing walls or ceilings, puddles in the basement, or mildew and mold growth on surfaces.

During the inspection, professional restoration technicians will use tools like a hygrometer and infrared camera to identify pockets of moisture. They will also look for the source of the water intrusion and determine the category and classification of the water (Clean, Gray, or Black).

Once they have a clear understanding of the situation, restoration technicians will move forward with their remediation plan. This may include removing building materials that can’t be dried or have come into contact with contaminated water. This includes drywall, carpeting, and other personal belongings that will need to be disposed of.

This process will also involve shutting off all electricity to the affected areas and identifying any safety hazards. A team of trained professionals will then begin removing any standing water from the property using equipment such as wet vacs and submersible pumps. This is done to reduce the amount of water that needs to be treated later in the drying and dehumidification process.

Extraction

Immediately after a water damage event, removing the excess water is an important step in mitigating damages and ensuring the area can be restored. Extraction involves using pumps and vacuums to remove standing water from affected areas, and may include removing furniture, carpeting, draperies, and other contents that can be saved. It also includes removing and securing items that cannot be saved, including drywall, insulation, and other structural components.

The extraction process can take several days depending on the extent of the water damage. It can involve identifying and shutting off the source of water, using thermal imaging to find hidden pockets of moisture, and employing advanced drying techniques like dehumidification, air circulation, and moisture mapping. In the case of class 4 water damage, specialized equipment like drying chambers and desiccant dehumidifiers can be used to extract deeply held moisture from dense materials such as concrete, plaster, or hardwood.

Once the excess water has been removed, the property can be dried and disinfected. This is an important step in reducing the risk of bacteria, mold growth, and other harmful microorganisms. It also helps reduce the chance of secondary damage from other causes, such as deterioration of materials or structural weakening caused by prolonged exposure to moisture.

Water damage can create a host of issues that threaten your health and safety, from respiratory problems to mold exposure and even chemical hazards. Professional mitigation addresses all of these issues, making your home safe again for you and your family to live in. If you suspect you have water damage in your home, contact a trusted restoration company as soon as possible to mitigate the damage and prevent further complications.

Remediation

Water remediation is the process of cleaning, sanitizing and drying everything affected by water damage. It bridges the gap between mitigation (stopping the flow of water) and restoration (repairing and rebuilding). It’s important to note that water remediation is not the same as cleanup and it is a separate step from the mitigation process. Mitigation focuses on stopping the flow of water and can include things like locating the source, turning it off, and removing building materials. Remediation can be dangerous and should only be done by a professional.

Remediation is especially important when dealing with contaminated water such as gray or black water (raw sewage). This water must be removed and disposed of properly to prevent sickness, discomfort and other long-term problems. If this is the case, a full decontamination and sanitation will be needed to ensure that all contaminants are eliminated from your home.

Restoration

Water damage restoration is a critical process that can save your home from structural damage, health risks, and expensive repairs. The first step is assessing the damage and identifying the source of the water intrusion. This could be a leaking pipe, malfunctioning appliances, or even external sources like flooding. Once the source is identified, your professional can take steps to stop the flow of water, such as tarping a roof leak or shutting off the water supply.

Next, your pro will remove any standing water from the affected area with pumps and vacuums. This can help reduce the risk of bacteria and mold growth. It is important to begin this process as soon as possible to avoid further damage and additional expenses.

After removing the water, your professional will disinfect and dry the area. This may include sanitizing personal belongings, cleaning furniture and flooring, and treating the space with antimicrobial treatments and deodorizers. They may also use moisture sensors to track humidity levels and ensure the area is completely dry.

Another important part of the restoration process is repairing any damages caused by the water. This could be as simple as replacing baseboards and drywall or as complex as reconstructing walls and ceilings. Your professional will assess the damage and recommend any necessary repairs.

It is important to have a professional perform this work as it can be dangerous and complicated, especially if there is structural damage involved. A trained water damage restoration expert will follow IICRC standards and local regulations. They will be familiar with category and class definitions, five essential restoration phases, mold integration, insurance claim strategies, advanced technology applications, and proactive risk reduction.

How to Identify Signs of Termite Infestation

https://www.benspest.biz/

There are a few major clues to watch out for. First, look for sagging floors or ceilings. If wood studs in walls sound hollow when tapped, this could indicate termite damage.

Another indication is finding mud shelter tubes, which are brown and about the width of a pencil. Termites build these to travel between the soil and wooden structures, such as home foundations or crawl space piers. Visit https://www.benspest.biz/ for more information.

Swarmers

Seeing swarmers of winged termites flying around your home during spring or rainy weather is a sure sign that there is a mature, established termite colony nearby. Swarmers are looking for new locations to form a colony and may be attracted to light. This is a good time to call in a professional for a termite inspection.

When swarmers settle in their new locations they shed their wings. If you notice piles of discarded wings near your windows or doors or in cobwebs and spider webs this is another indicator that there is a termite infestation present.

Sagging floors or ceilings are another clear indication that a termite infestation is present. As these pests eat their way through wooden structures, they create tunnels inside of them that can cause them to sag and warp.

If you hear quiet clicking sounds coming from your walls or see mud tubes traveling over or through foam insulation, it is likely that there is a subterranean termite colony nesting nearby. While these signs of a termite infestation are more common in homes with Formosan or eastern subterranean termites, they can also be seen in properties with western drywood termite colonies as well.

Other telltale signs of a termite infestation include hollow-sounding wood, sagging or stuck windows or doors, and drywall damage that resembles mold. It is important to contact a qualified pest control specialist as soon as you see any of these signs so they can perform an introductory termite inspection and prevent serious structural damage. If left untreated, a termite infestation can lead to costly repairs and even severe structural damage. This is why it’s critical to recognize and act on the early warning signs of a termite problem such as swarmers, mud tubes, discarded wings, sagging walls or ceilings, and frass (termite droppings that look like pellets).

Mud Tubes

Termites are known for tunneling through wood, which creates moisture and leads to structural damage. Stiff windows, warped door frames and hollow sounding wood are often the first signs of termite infestation. Mud tubes are the most common sign of subterranean termite activity and are easily spotted in outdoor areas. They look like pencil-sized dirt tunnels, blending in with concrete or soil around foundation walls and in crawl spaces. They’re also a frequent sighting indoors, usually behind baseboards, crown molding and window frames.

Mud tunnels are vital for a termite colony to survive, and they help maintain proper temperature and humidity levels. Made of saliva and fecal material, the tubes block out dry air and help maintain high humidity. Mud tubes can be found anywhere that the ground meets a building, including foundation walls and basements, as well as under porches and in crawl spaces. In addition to mud tunnels, termites also build drop tubes, which hang from joists toward the ground and are often found around plumbing penetrations, HVAC lines, ductwork and ceilings.

Finding mud tubes is a solid indication of an active termite infestation. Different types of mud tubes serve distinct purposes, but if you see any type, it’s best to contact a professional to schedule an inspection and treatment. Exploratory mud tubes are thin trial tunnels that workers build when testing new food paths. These are typically spotted on foundation walls and may extend a few feet before ending. Working mud tubes, on the other hand, are thicker and more durable. Termite colonies use them to move worker and soldier termites between their nests and wood they’re feeding on. They’re a little like termite highways, running along foundation walls, sills, joists and under porches.

Wood Damage

A termite infestation can cause wood damage, especially when the pests attack softwood. They also eat away at the support beams of homes, causing them to buckle and compromise structural integrity. Wood floorboards may also buckle and blister, causing them to sound hollow as you walk across them. Termite-damaged wood may have a musty or moldy scent and often has visible signs of decay.

Termites can chew through both healthy and rotting wood, but they prefer softer materials like paper and drywall, which are easier on their mandibles. These pests can leave behind pin-sized holes in drywall, as well as bubbling under wallpaper or paint. If you notice these signs of decay in your home, contact your local Terminix for a professional inspection.

Swarms of flying termites are a telltale sign of a potential termite problem. While many people mistake swarming termites for ants, swarming termites are distinguishable by straight antennae and a robust mid-section that is more defined than the tapered middle of an ant.

Discarded wings are another classic indicator of a possible termite infestation. Termite swarmers shed their wings after they land and will leave piles of broken or discolored wings near windows, doors, or other entry points in your home. You may even hear quiet clicking sounds from inside walls as the soldier termites beat their heads against the wood to signal danger to the other colony members.

Wood that is a common target for termites is any type of timber or wood-based product, including furniture, flooring, and wooden beams. It is important to regularly check these areas for termite infestations, especially if you have recently moved into a house or office building that has not been maintained previously. Moisture is the biggest attraction for termites, so it is a good idea to keep water away from wood, fix leaky roofs promptly, and reduce humidity in crawl spaces.

Discarded Wings

Like ants, termites shed their wings as they move to start new colonies. When you see piles of discarded wings near your windows and doors, you should assume that there is an active termite infestation nearby. You can distinguish discarded wing piles from ant pheromone trails by the size difference between the front and back wings, or by their translucent color.

Mud tubes are another clear sign of a termite infestation. These tubes are constructed by worker termites to shelter themselves from sunlight and weather as they forage inside the wood of your home. If you find mud tubes under your foundation or in crawl space cement blocks, call a pest control expert immediately for a professional inspection and treatment plan.

If left unchecked, a termite infestation can destroy your home and lead to expensive repairs. Recognizing the early warning signs of a termite problem can save you hundreds, or even thousands, in costly repairs down the road.

When termites invade a home, they eat away at the structure from the inside out. The resulting damage can cause support beams and other structural elements to crack or collapse. A professional termite inspection can identify a problem before it causes significant damage and costly repair costs.

In addition to mud tubes, swarmers, wood damage, and discarded wings, other common symptoms of termite infestation include hollow-sounding wood, squeaky floors, stuck doors and windows, and moldy odors. Be sure to carefully read the pesticide label when applying any insecticide around your home, as improper application of certain products can drive termites deeper into the house. Contact a pest control expert for a professional termite inspection to ensure that you’re using the right products in the correct places to prevent future infestations.

Blistering Wood

Termites often cause structural damage in homes without obvious signs on the surface. These pests are able to tunnel through wood structures such as baseboards and walls, which can weaken them and cause sagging floors and ceilings.

One of the most common warning signs of a termite infestation is blistering wood. This occurs as a result of subterranean termites chewing through drywall and other paper products to access the cellulose inside. Termites leave blistering marks on the surface of wood and can also create moisture conditions that may lead to paint bubbling or dimpling. If you notice any of these symptoms, call your local termite control expert for a professional inspection.

Another common sign of a termite problem is hollow-sounding wood. Termites eat wood from the inside out, leaving a thin veneer on the surface that sounds hollow when tapped. While this could be a sign of other issues, such as wood rot or water damage, it is also a clear indication that there is an active termite infestation nearby.

Other subtle signs of a termite problem include clicking noises, which are created by worker termites communicating with each other. In addition, if you notice tiny pinholes in drywall or smudged wallpaper, which are left behind by termite tunneling, this is another indicator that you need to schedule a termite inspection.

Other less obvious signs of a termite infestation include the appearance of piles of pellet-like frass, small kick-out holes in wood and discarded wings. While discarded wings and mud tubes are more obvious, these signs can go unnoticed for months before an exterminator is called in. Identifying these signs as soon as they appear can help you prevent extensive structural damage and minimize the cost of a termite treatment.

Cabinet Painters and Proper Surface Prep Explained

Modesto Cabinet Painters

Painting kitchen cabinets isn’t as simple as grabbing paint off the shelf. Cabinet surfaces accumulate invisible contamination, requiring degreasing to promote good adhesion.

Physical sanding creates the mechanical bond paint needs to grip existing finishes. Start with coarse 120-grit sandpaper, then smooth with finer grit, always sanding with the grain. Contact Modesto Cabinet Painters for more details.

Sanding

Sanding is one of the most critical steps for preparing wood surfaces for painting and staining. It requires patience, careful attention and an understanding of how the abrasive materials work to smooth and refine surface appearance. There are several different sanding options available, depending on the type of material and the desired quality of finish, as well as working environment and safety concerns. The team at Red Label Abrasives compares wet and dry sanding methods to help you choose the right approach based on your project requirements.

It is important to note that the quality of your paint job will be directly related to how well you sand your surface. A good sanding will remove loose debris, blemishes and imperfections, giving you a clean and smooth surface to work with. In some cases, you may need to sand the surface twice in order to achieve the desired results.

In woodworking, sanding is done with a variety of tools ranging from simple manual blocks and sponges to electric sanders designed to speed up the process and reduce physical effort. Choosing the right sandpaper is also critical, with lower numbers indicating coarser abrasives that remove material quickly and higher grits referring to finer abrasive grains for smoother finishes. It’s also important to remember that woods come in all sorts of densities and some sand more easily than others.

Other methods of surface prep include pressure cleaning, which uses a high-pressure spray to remove loose debris and contaminants from the substrate, and flame blasting, which involves holding a gas flame over the surface, effectively removing rust and other unwanted residue. Whatever method is chosen, it’s important to follow the guidelines set out by independent industry oversight agencies. These standards help standardize the results and provide a template to meet specific job specifications.

Cleaning

Cabinets are frequently-used, high-visibility surfaces that require a durable finish. It is easy for amateur painters to cut corners that can shorten the lifespan of a paint job, but skilled cabinet painters understand how important it is to thoroughly degrease surfaces and apply multiple coats of high-quality cabinet paint to ensure durability and longevity.

The process of refinishing kitchen cabinets involves careful and efficient removal of doors and drawers, labeling for return, degreasing, sanding, applying a bonding primer, and painting using fine finish spray techniques. This creates a smooth factory-like surface that is durable and ready for new hardware or a updated backsplash.

Experienced cabinet painters will use high-quality acrylic or polyurethane blends that are specifically designed for the surface to be painted. These are more durable than vinyl latex wall paints and can withstand the unique conditions of a kitchen without peeling or bubbling. A wide range of colors are available, from soft pastels to bold statement hues. Customizations like glazing or antiquing are also offered to give your cabinetry a truly unique look and feel.

Primer

If the surface you are painting is porous or has a dark color it will need to be primed before repainting. A primer seals the surface and helps the paint to be absorbed evenly. An unprimed surface will absorb the paint in blotchy areas, which makes for an uneven finish. The use of a primer reduces the amount of paint needed to cover the surface and allows it to be repainted in a shorter amount of time.

Some types of primer can be tinted to help them match the color of a particular type of finishing paint. This is especially helpful if the primer is being used on a large area of the wall or on a darker surface where the color needs to be evened out. A primer can also be used to hide cracks or pin holes in the surface.

Before applying a primer, the surface should be sanded down to make sure it is smooth and ready for painting. You should also make sure to protect any areas that you do not want to be painted with painter’s tape. After the surface is sanded and cleaned it is important to allow the primer to dry completely according to its label instructions. This can take up to a couple hours, depending on the temperature and humidity of the environment.

When using a latex primer, it may take up to an hour for the surface to be dry to the touch. After this time it is ready to be painted. When using a oil-based primer it may take up to two hours for the surface to be dry. Once the primer is dry it is important to allow the topcoat of paint to cure completely. This can be done in a few different ways, depending on the type of paint and the surface.

The most common type of primer is a white latex based primer, although there are many other colors available as well. A painter should always use a high-quality brand of primer to ensure the best results. The amount of coats required for a surface to be ready to paint will vary, but usually one coat is sufficient when painting a wall in good condition that is not being made a drastic change in color or a glossy finish.

Paint

When it comes to cabinet painting, the quality of the finish is what sets apart a professional from an amateur. Professionals follow a meticulous process that includes carefully removing and labeling hardware, degreasing surfaces, sanding, and applying multiple coats of specialized paint designed to hold up to kitchen wear and tear. Budget shortcuts may save money upfront, but often result in visible brushstrokes and an uneven texture that requires expensive repair or repainting down the road.

Unlike walls or ceilings, cabinets are frequently handled and exposed to grease, oils, and moisture. These conditions can compromise a finish before it’s even fully dry, resulting in flaws like peeling and bubbling. Professionals use a wide range of specialized products that are specifically designed for high-traffic cabinetry, including water-based acrylic polyurethanes. This ensures a durable, eye-catching finish that stands up to daily use. House painters, on the other hand, typically rely on latex wall paint that cannot stand up to the unique requirements of cabinetry.

Before the final color can be applied, a ground is usually applied to create an underlying tone that enhances the effectiveness of the top coat. This step is a key differentiator between cabinet painters and house painters. A ground is a dark tone that helps conceal imperfections, such as surface scratches or dings, and provides an even canvas for the application of full color.

Once the ground is dry, the surface can be ready for paint, which is usually applied with a sprayer. The number of coats used will depend on the desired outcome, with more coats providing a deeper, richer appearance. Finally, the finish can be cured for up to a month to allow for proper drying and hardening.

While there is no shortage of companies that claim to offer cabinet painting services, finding an experienced and knowledgeable professional who truly understands the process can be challenging. By taking the time to find a reliable company with an established track record, homeowners can enjoy a beautiful new look that will last for years to come. Achieving this goal requires a thorough understanding of the entire process, from sanding to preparing surfaces to preventing dust and debris buildup during the job.

Exterior Window Cleaning for Multi-Story Homes

Exterior Window Cleaning Service

Exterior Window Cleaning Service reduces the risk of damage to your home’s windows and allows for maximum natural light. Cleaning your own high or hard-to-reach windows can be a DIY project, but it’s important to know what to expect and use the right equipment for safety.

Quality tools include a long pole with a cleaning head, professional squeegees and scrub brushes, and microfiber cloth holders. Water-fed pole systems deliver purified water directly to the cleaning head, eliminating the need for ladders in many situations.

Safety First

Cleaning high windows and hard-to-reach surfaces is challenging and requires careful planning. Using proper equipment and techniques ensures quality results without putting yourself or others at risk. However, if you’re working at heights or on unstable surfaces, even simple mistakes can lead to serious injuries.

Having the right equipment is critical for safe window washing, and that includes ladders and extensions, a squeegee or scrubber, microfiber cloths, and a mild cleaning solution. Ladders should be set up on stable ground and secured with stabilizers, and a harness may be helpful in some situations. Non-slip ladder shoes, tool lanyards to prevent dropped equipment, and proper work gloves help reduce risks as well.

Weather conditions can also exacerbate risks, especially windy or rainy days. Wet surfaces increase the likelihood of slipping and falling, and strong winds can affect balance and make it harder to control tools. Checking weather forecasts and surface stability before starting cleaning is essential to preventing accidents.

Proper technique is essential for safe window cleaning, and this includes choosing the correct spray angle and pressure. Too much water pressure can damage window seals or force water into frames, while a shallow angle increases the chance of streaks. Applying the cleaning solution to the surface with overlapping strokes helps remove stubborn dirt and rinse away excess moisture, ensuring a clean, streak-free finish.

After the cleaning solution dries, using the squeegee to pull it off in smooth, consistent strokes eliminates streaks and minimizes the risk of re-wet spots. Cleaning windows on a sunny day should be avoided if possible, as direct sunlight can dry the solution too quickly and leave unsightly residue.

A clear, streak-free view is an important part of a home’s curb appeal, but some window cleaning tasks are better left to the professionals. Hard-to-reach windows, steep rooflines, and multiple stories increase the risk of injury, and recognizing when a job is safer for professional care protects homeowners as well as their property. Professionals have the training, equipment, and expertise to handle the task safely. Investing in professional maintenance prevents costly repairs and extends the life of your home’s windows.

Tools

The right tools make all the difference in a quality cleaning job, especially when it comes to working at heights and handling complex windows. Basic store-bought equipment may work for light touch-ups, but when dealing with second-story windows, panes with special coatings, and environments that can produce heavy dust and pollen, specialized gear is necessary to achieve great results.

Ladder accessories like stabilizers and safety harnesses allow professional cleaners to tackle the job safely and effectively. In addition to these essential safety items, a high-quality extension pole and squeegee are the best choice for reaching hard-to-reach window areas on homes with multi-story exteriors. Choose a telescoping pole with an adjustable head that fits your needs and is compatible with a variety of attachments, including brushes and scrubbers for removing dirt buildup or stubborn stains.

A quality squeegee with an appropriate rubber blade prevents water marks, skips, or streaks. Professionals carry a selection of sizes to handle different types and widths of window glass. High-quality microfiber towels are also useful for wiping up drips, detailing edges, and touching up finished windows.

For the most challenging spots, opt for a cleaning solution that is specially formulated to remove dirt and grime effectively without damaging frames and seals. The best solutions will break down stubborn stains, reduce the risk of streaking, and leave surfaces clean and sparkling.

To get started, rinse the windows with a garden hose attachment’s soap dispenser and apply the cleaner using smooth, sweeping motions. A squeegee can then be used to wipe off the remaining residue, leaving behind a spotless finish. Finally, a final rinse with the hose eliminates any traces of dirt and a fresh, streak-free finish. With the right equipment, even difficult-to-reach windows on multi-story properties can be cleaned efficiently and safely, ensuring that natural sunlight can brighten interior spaces and outdoor views. This is why experienced professionals rely on purpose-built gear to deliver consistently exceptional results for homeowners and commercial clients alike.

Cleaning Solution

Clean windows are essential for letting natural light brighten your home and creating a more welcoming exterior. Dirt buildup and streaks from ineffective cleaning methods can detract from your home’s curb appeal, but a few easy tips and solutions can keep your windows sparkling clean and clear. Whether you choose to use long reach window cleaners or hire professionals, you can enjoy sparkling, clear windows all year round.

Invest in quality cleaning tools designed for multi-story window washing. Ladder accidents are one of the leading causes of injuries when tackling DIY window cleaning, and it’s important to follow safety protocols when working on ladders. For example, always place a ladder on stable ground and avoid leaning or overreaching while cleaning. Additionally, it’s a good idea to have a spotter and a water bucket nearby in case of falls or spills.

When washing high windows, it’s important to prepare the window and cleaning solution ahead of time. Start by cleaning the window frames, grids, and hardware using cloths or brushes and a mild detergent or soap solution. After washing, rinse the window with a water hose or bucket of soapy water to remove any remaining suds. Finally, wipe the window with a squeegee or microfiber cloth to remove any excess water and ensure a streak-free finish.

For a more efficient and effective cleaning experience, consider investing in long reach window cleaners or water-fed poles. These tools have built-in water lines that supply purified water directly to the window cleaning head, making them ideal for multi-story homes. In addition to increasing safety, these tools also provide a more thorough clean than traditional cleaning methods and leave your windows streak-free.

If you’re unsure how to tackle cleaning high windows or aren’t comfortable using a ladder, hiring professional window cleaners may be the best option for you. Professionals bring local expertise and specialized tools, such as long reach window cleaners or water-fed window cleaning poles, to the job and can efficiently and effectively clean even the hardest-to-reach windows. In addition, professional window cleaners understand proper safety protocol for working on ladders and can help minimize risks associated with DIY window cleaning.

Drying

Clean windows enhance the beauty of your home and create a welcoming environment for guests. Whether you do the work yourself or partner with professional window cleaners, proper preparation and quality equipment are essential to the process. Using the right tools can help you save time and achieve superior results while working at heights. Ladder stabilizers, safety harnesses, ropes and anchors, and non-slip ladder shoes are all important safety accessories that professional window cleaners never work without.

Start the cleaning process by rinsing the window with water. Then, add your chosen cleaning solution to the water. Dish soap is a cost-effective option that can effectively cut through dirt while not damaging window frames and seals. Vinegar is another good alternative to consider when scrubbing hard-to-reach or stubborn stains.

Once the cleaning solution is mixed, dip your sponge or brush into the soapy water and allow it to soak for a few seconds. Once it’s saturated, remove the brush or sponge from the water and squeeze out any excess liquid. Be sure the surface of the sponge is dry before you apply pressure to the window.

Scrub the window with your scrub brush and the cleaning solution, focusing on any heavy stains or build-up. Always apply light pressure and be careful not to damage the window frame or sills. Use a microfiber cloth to wipe the squeegee after each stroke and wipe down the blade between applications. After scrubbing and rinsing, use the squeegee to smooth the glass and leave behind a streak-free finish.

After squeegeing, take a step back and inspect your work. Look for any areas that may need to be rinsed or re-cleaned, such as a lingering spot of soap. If you need to, rinse the area with water and repeat the scrubbing and rinsing process as needed.

If you’re unable to reach high windows with a ladder, consider investing in a specialized cleaning system designed specifically for multi-story homes. These systems feature telescopic poles, professional-grade squeegees, and scrubbers to enable you to complete the job without having to make multiple trips up and down a ladder. They also come with ladder stabilizers, which ensure stability on uneven ground or gutters and reduce the risk of ladder shifts that can cause accidents. For additional safety, consider investing in a harness and ladder anchors, and always have a spotter to assist with steadying the ladder.